Wednesday 31 December 2014

Things with Wings

Hi again! One of my ATC trading friends collects an altered postcard (APC) deck themed Things with Wings. Owing her some cards, I was inspired to create characters that don't have wings normally, so please meet my Cat King and Vintage Miss Teacup!

I made them inspired by the style called Zetti - see yesterday's post with some more about it! I've also written about APCs before. Check these posts, if you're interested!


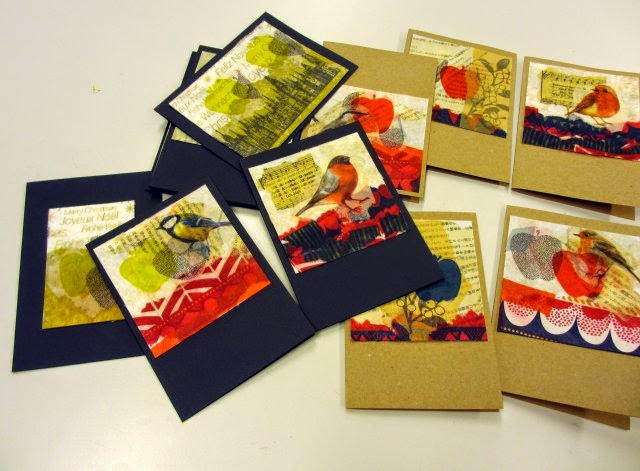
Both APCs have beeswax collage backgrounds, using napkins and book pages among other scraps. In the Cat card I also used metallic acrylic paint and added some more napkins for texture.

With the first card, I'm participating in the Creative Gym challenge at the Mixed Media Place blog. This month's theme is Wings and you can join until January the 19th!


The butterfly wings are free downloads from the Graphics Fairy, and so are the teacups actually!

Here's another flying kitty wishing you a happy, fun and creative New Year!

Tuesday 30 December 2014

What a Zetti Christmas!

Hello to you all! I'm the kind of Christmas person who likes to linger in the Christmas mood until it's New Year's Day - and more so if I'm on holiday and don't need to work in the days between. So here's still some Christmas themed crafts being posted - I hope you don't mind!


This set of ATCs was inspired by a swap titled Zetti Christmas. Zetti is a quirky, whimsical art style named by artist Teesha Moore, where some of the typical elements are: mismatched heads, eyes and limbs, funny hats and other circus/party gear, plus colourfulness combined with black and white, especially stripes and polka dots, and so on.


I've only tried to work in zetti style a few times and am not always happy with how it turns out, but I think it's a very fun exercise for a collagist nevertheless! It helps me to think of paper scraps in terms of forms, instead of what the scrap is intended to depict.

I'm not sure if I can explain it very well, but I'll try: For a collage character's -dress, for example, the easy choice would be to look for an image of a dress to cut and paste, but if I think like Zetti, I would have to pick a totally different item instead, and make it the dress. Or a body, or a head, or any part. It's quite liberating for the mind, I think, and a lot of fun!


I'm linking to Collage Obsession, theme Winter/Christmas, and Take a Word, theme Red/Green. Tomorrow I'll be posting the rest of my Zetti cards, so remember to pop in again if you'd like to see them!

Saturday 20 December 2014

Little House Mixed Media Cards

Hello! Here are a couple of Christmas cards that are very easy to do even in the last minute.


I wanted to experiment with white finger paint, because I might want to use it for teaching workshops where also children can participate. I was happy to see that it looks fairly opaque, which means it covers even a dark background easily. Some other brands of finger paint I've tried before have been too watery or transparent.

Squeeze Punches by Fiskars are easy for kids to use and they usually love them! Here I've used the Scalloped Heart one.


These cards were made with the following challenges in mind:

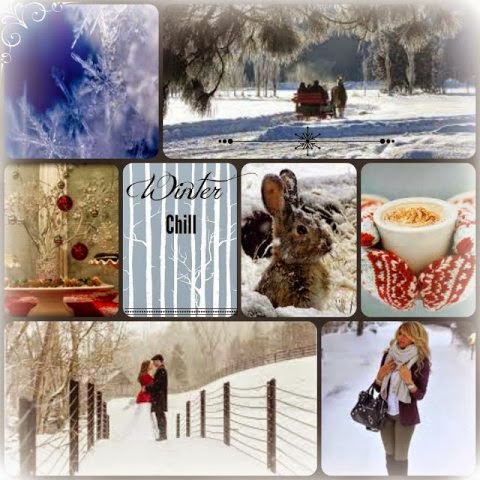
In Berry71bleu's Winter Chill Mood Board, I was inspired by the colour palette of white with some blues, browns and a pop of red, and also the Fair Isle knits.


At Paperdvizhnik, the theme is My New Year or Christmas Time. Note that you can join until January the 12th!


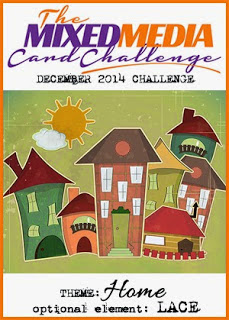
And last but not least, the Mixed Media Card Challenge had the theme of Home this month, with Lace as an optional element.


There's still time to join all of these challenges. That or any other craft that inspires you. Enjoy your weekend!

Wednesday 17 December 2014

Snowy Scenes with Structure Paste

Hello! Today I'm posting some more winter themed cards. The first one is an ATC and the two arches are postcard size, but I made the images the same size for better viewing.


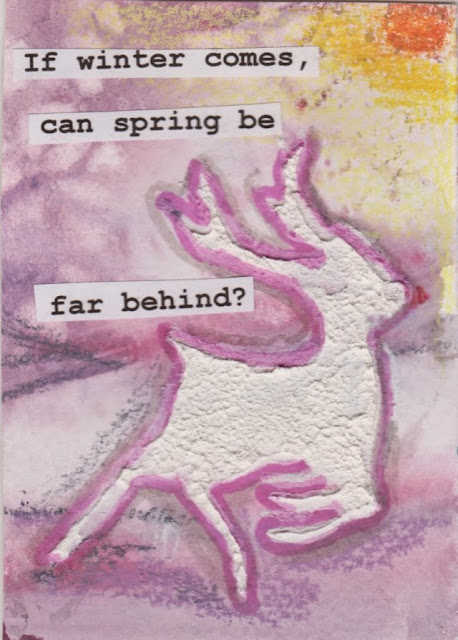
The snowy reindeer and tree figures are made with structure paste, using remnants from die cut cardboard as stencils. There is stenciling in the background, too, which was done with tube watercolours through a doily. The sun in the first card is hand drawn with watercolour pencils and the tree in the second one, with Promarkers.


The quotes are parts of longer poems, by Lewis Carroll (I wonder if the snow loves the trees and fields -) and Percy Bysshe Shelley (If winter comes, can spring be far behind?)

I'm entering these in two challenges, both of which had an "Anything Goes" theme this time: Simon Says Stamp Monday Challenge and
Thatscrafty *not eligible for the prize draw, as I'm not an UK resident.

Thanks for popping in!


Monday 15 December 2014

Vintage Winter Wonderland Arches

Hello to you all, and happy Monday! I love the Gothic Arch shape and I also think it's fun to make cards in a different format every now and then. Today and tomorrow I'm posting two different sets of wintery Gothic Arches.

The images are from napkins decoupaged on mixed media background. I added some almost invisible vellum snowflakes and structure paste for snow effect on the borders, and gave the finishing touch with red Stickles and some tartan patterned ribbon. The size of these is 4x6 inches, as in postcards, but with the arch shape.


I'm linking to the following challenges:
Take a Word (Winter)
The Three Muses (Vintage Gothic Arch) and
P*skarteluhaaste #257 (Vellum) *en osallistu arvontaan!


Last weekend I got to enjoy the most beautiful snowy scenery, visiting my cousin just two hours north of metropolitan Helsinki, where I live. Here by the sea it's plain ugly, dark, wet and windy at the moment, but I'm confident there'll be a turn to better winter weather once we have passed Christmas. Or the sooner the better, of course!

Friday 12 December 2014

Ja tässä valmiit mehiläisvahakortit! / This is what the beeswax cards look like!

Hei taas! Jatkona eiliseen postaukseen, tänään laitan ihailtavaksi viime kuun joulukorttikursseillani olleiden luomuksia, heidän luvallaan tietysti. Ensimmäisen kuvan kaksi korttia ovat minun tekemiäni.

Hello! Today I'm posting Christmas cards made at my Beeswax Collage workshop last month. With the permission from those who made them, of course. Except the two cards in the first picture - those were made by me. See more about the workshop in yesterday's post!


Oli niin jännittävää nähdä, miten monenlaisia tyylejä kurssilaiset saivat aikaan! Servettivalikoimaa ja taustana olevan korttipohjan väriä vaihtelemalla syntyi jokaiselle oman näköiset kortit. Moni toi omia servettejään sen ison pinon lisäksi, jonka olin Servettipuodista etukäteen tilannut.

It is exciting to see how many different styles the participants came up with, depending on the selection of napkins and the colour palette of the background cards they used. From graphic to more traditionally Christmasy, and all so lovely!


Kuten jo aiemmin olen hehkuttanut, olen iloinen, että olen löytänyt tämän vähemmän tunnetun tekniikan ja hurjan kiitollinen, että olen päässyt pitämään kursseja siitä! Paperikerrosten silittäminen tuoksuvalla mehiläisvahalla on rauhoittavaa, mutta myös mukaansatempaavaa puuhaa, ja oli mahtavaa huomata, että kurssilta ei olisi maltettu lähteä päivän loppuessa pois. Suuret kiitokset vielä kaikille mukana olleille ihanista kurssipäivistä!

Kevään kursseille voi nyt ilmoittautua - tervetuloa kaikki sopivan matkan päässä Espoosta asuvat, vanhat ja uudet mehiläisvahakortteilijat!


I'm really happy to have heard of and learned this less well known, but not at all difficult technique. And super grateful for the chance to teach workshops on it! Everyone who does not live too far away is heartily welcome to the following ones in March. Have a nice weekend!

Thursday 11 December 2014

Joulukortteja mehiläisvahan tuoksussa / My Beeswax Workshop

Heippa! Jo mennään kovaa vauhtia kohti joulua, ja vasta nyt ehdin postaamaan kuvia viime kuun kursseilta. Opetin ensimmäistä kertaa korttikurssin yhdellä viime aikojen lempitekniikallani, joka on mehiläisvahakollaasi. Kokoonnuimme Espoon työväenopiston tiloissa Ruusutorpan koululla, ja pidin saman kurssin eri porukoille lauantaina ja sunnuntaina.

Aloin opetella tekniikkaa pari vuotta sitten itsekseni amerikkalaisten ATC-vaihtokavereideni ohjeilla, ja ihastuin siihen ensi yrittämällä. Serveteistä ja silkkipapereista tehdään sulan mehiläisvahan avulla herkät, läpinäkyvän kerrokselliset kortit. Tekniikasta kerrotaan enemmän aiemmissa postauksissani, esimerkiksi täällä. Lisää tällä tekniikalla tekemiäni kortteja löytyy myös oikean sivupalkin tunnistelistasta valitsemalla Beeswax!


Kollaasitekniikassa pääsee helposti vauhtiin ja saa kauniita kortteja aikaan myös ilman, että on harrastanut paperiaskartelua juurikaan aiemmin. Toisaalta jos perustekniikkaan kaipaa lisää elementtejä, voi lisäillä mukaan esimerkiksi leimailua tai värillisiä vahoja. Oli ilo huomata, että sekä enemmän että vähemmän harrastaneet askartelijat tykkäsivät tästä kurssista! Tätä on luvassa jälleen maaliskuussa - kevään kurssitiedot löytyvät täältä!


This post is mostly in Finnish and it's about beeswax collage workshops I'm giving in my home town Espoo, Finland. I've written more about this technique in my blog earlier, see for example here, and in all Beeswax themed posts in the tag list. This is truly a lovely technique and easy to get started with!


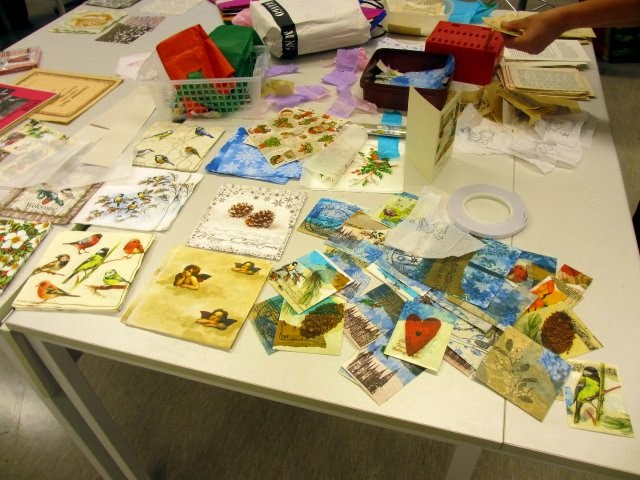
Tältä tarvikepöytä näytti lähtötilanteessa: rutkasti erilaisia servettejä, kirjansivuja, silkkipapereita ja silkkipapereille leimattuja kuvia.

This is what the supplies table looked like before we got started: lots of different napkins, bookpages and images stamped on tissue paper.


Lisätään mehiläisvahaa ja aletaan silittää... minun kursseillani tosiaan käytetään silitysrautaa vahan sulattamiseen ja kerrosten toisiinsa kiinnittämiseen! On olemassa sulatuspatoja varta vasten tähän, mutta sellaista en ole itse päässyt kokeilemaan. Silloin vaha levitetään siveltimellä, jonka pitää olla luonnonkuitua, jotta se kestää kuuman vahan.

Add some beeswax and begin to iron... and leave the cards to dry a short while!


Tervetuloa huomenissa uudestaan kurkkaamaan, miltä valmiit kortit näyttävät!

In tomorrow's post you can see what the finished cards look like, so you're most welcome to pop in again!