Monday, 25 March 2013

Let's Soak up the Sun

This layout is my take on the March challenges at Once Upon a Sketch (OUAS), where the theme was Weekend, and Inkido, with the theme of the Great Outdoors.

I enjoy long walks when winter is getting close to spring and even we in the Nordic countries get to enjoy the warmth of the sun again. This winter had been cloudy so far and we’d also been busy renovating a bedroom. So the best chance to enjoy a walk next to the frozen seafront was on a weekend to our neighboring country’s capital Tallinn, a 2 hour ferry trip from Helsinki.

It was really quiet along the seafront where we walked, but we did see a path in the snow so we could tell it had been walked on. We were heading for a new and acclaimed Maritime Museum called Lennusadam (the Seaplane Harbour). It’s located in a sort of industrial area /old fishery neighborhood, which was not of touristic interest until very recently. All we knew was we’d find the museum following the path by the sea!

I can really recommend the museum to anyone who’s going to Estonia. Especially those of you who are inspired by the Steampunk style would love it, with all the antique instruments and machinery. You even get to go inside a submarine! There was enough to look at for the whole day for us parents and the 5-year-old. Heaps of scrapworthy pictures are waiting for another post!


Here’s the OUAS Sketch:


Nautitaan auringosta

Osallistun tällä työllä maaliskuun Once Upon a Sketch -ja Inkido-haasteisiin. OUAS:in luonnospohja on tässä llä ja leiskan aiheena oli viikonloppu, Inkidolla puolestaan ulkoilmaelämä.

Molempiin aiheisiin sopi hyvin kuva Tallinnan matkalta viikko sitten. Tykkään käydä talvisin kävelyllä jäällä tai jään äärellä, mutta tänä talvena se oli jäänyt väliin. Tallinnan satamasta uuteen Lentosataman merimuseoon oli mukavan pituinen kävely ja melkein kokonaan rantaa pitkin. Pirteästä pakkasesta huolimatta aurinko lämmitti jo ihanasti kasvoja!

Museo on aivan upea, suosittelen lämpimästi! Valokuvata sai vapaasti ja innostavia aiheita oli vaikka kuinka. Etenkin steampunk-tyylin ystävälle löytyy ihailtavaa ja kuvattavaa vanhoissa mittaristoissa ja muissa laitteissa. Postaan varmaan myöhemmin jotain museon antia!

Monday, 11 March 2013

Happy Orange

Here's a chunky book page sized 4x4 inches. The theme is monochromatic Orange, so it felt just the right place to test my new stamp, a girl's face in a calendula flower. It is from Viva Las Vegastamps and I like it a lot. It's so cheerful yet not too cutesy to my taste.

This was also the first time I used fabric or paper flowers in my crafts. I didn't like them at first but now I feel like using them a lot. It can turn out fun to sometimes re-think your opinion of a product!


Oranssin iloa

Tyttö kehäkukan keskellä oli kuin tehty leima tähän projektiin. Saaja toivoi 4x4-tuumaisesta Chunky Page -sivusta yksivärisen oranssin, ja Viva Las Vegastampsin iloinen kukkaistyttö sopi siihen ihan mainiosti.

Innostuin jopa kokeilemaan ensi kertaa kukkaiskoristeita sivuun. En tykästynyt niihin heti alkuun, mutta askartelutarvikkeiden suhteen on joskus hauska muuttaa mieltään!

Pallokuvioinen nauha on Askartelu Amaliasta. Viininpunainen, tarrapohjainen ornamenttinauha oli kesälomareissun löytö Tukholman Pandurosta.

Thursday, 7 March 2013

Hand Art, Part II

These are for a Pick-a-Theme swap at ATCs for All. It means the recipients of the cards have chosen the themes for me to make, and they were Birds, Native American and Odd Colored Giraffes! The last wish was indeed so odd that I sort of had to draw it myself, didn't think I'd find an image elsewhere. But it was a good challenge and in the end the Giraffe is the one I'm happiest with!

The green background is painted with acrylics and the earth yellow one is made with industrial liquid watercolours. Before applying the watercolour, the pattern was embossed with white wax crayon with an industrial steel plate under the paper.

Your hand can be in any position when you draw it, and this time I tried to take advantage of the unusual shapes of the hand cards!


Käden kuvia, osa II

Nämä kädet tein ATCs for All -yhteisön vaihtoon, jossa vastaanottaja sai määrätä aiheen. Vaikein aihe oli Kummallisen värinen kirahvi, mutta tästä kortista tulikin lopulta suosikkini! Halusin näissä töissä myös hyödyntää sen, että käden voi piirtää missä asennossa tahansa.

Vihreä tausta on tehty akryylimaaleilla. Keltainen on maalattu nestemäisillä vesiväreillä paperille, johon on ensin raaputettu valkoista vahaliitua kohokuvioidun pellin päällä. Peltitekniikan neuvoi Soili Kokkonen Helsingin työväenopiston kurssillaan.

Monday, 25 February 2013

Beeswax Part II: Use It for the Background

When I first tried beeswax in a collage, I instantly loved the transparent look of the layers. However, with ordinary paper it did not work as well as with napkins, or other porous papers that let the melted wax go through.

This time I wanted to use beeswax for the background only, and add the rest of the collage elements later. For sewing themed cards, I chose recycled clothes patterns. The paper sort is similar to tissue paper, so it worked very well. I pasted it on yellow-green pearlescent cardstock with beeswax and cut to ATC size when dry.

The sewing machine is a free download from Missie Krissie's blog. I printed it on pink and green scrapbooking papers. Spring colours seemed a good choice, when we're finally getting some sun!

Before adding the image, I stamped around the corners with Staz-on permanent ink. Last but not least I made a simple flower of fabric scraps to brighten it up.


ATC-korttipohja mehiläisvahatekniikalla


Ihastuin heti ensikokeilulla mehiläisvahakollaasin läpinäkyvään vaikutelmaan. Siihen sopivat parhaiten vahaa läpäisevät paperit, kuten silkkipaperi ja servietit. Tällä kertaa kokeilin käyttää mehiläisvahatekniikkaa vain taustaksi ja kiinnittää loput kollaasielementit myöhemmin.

Ompeluaiheinen kortti syntyi kivasti kierrätetystä vaatekaavasta, jonka paperi on juuri oikeanlaista silkkipaperin tyyppistä. Postikortin kokoisesta pohjasta tuli kaksi ATC-korttia. Leimailin sinne tänne Staz-on-musteella, joka kestää kiiltävillä pinnoilla varmimmin. Ompelukone on vapaasti ladattava kuva Missie Krissie -blogista. Muutin kokoa sopivaksi ja tulostin sitä kahdelle erilaiselle skräppipaperille. Pirteänä viimeistelynä toimivat tilkkulaatikon aarteista tehdyt kukat. Aurinkoisia kevättalven päiviä kaikille!

Wednesday, 6 February 2013

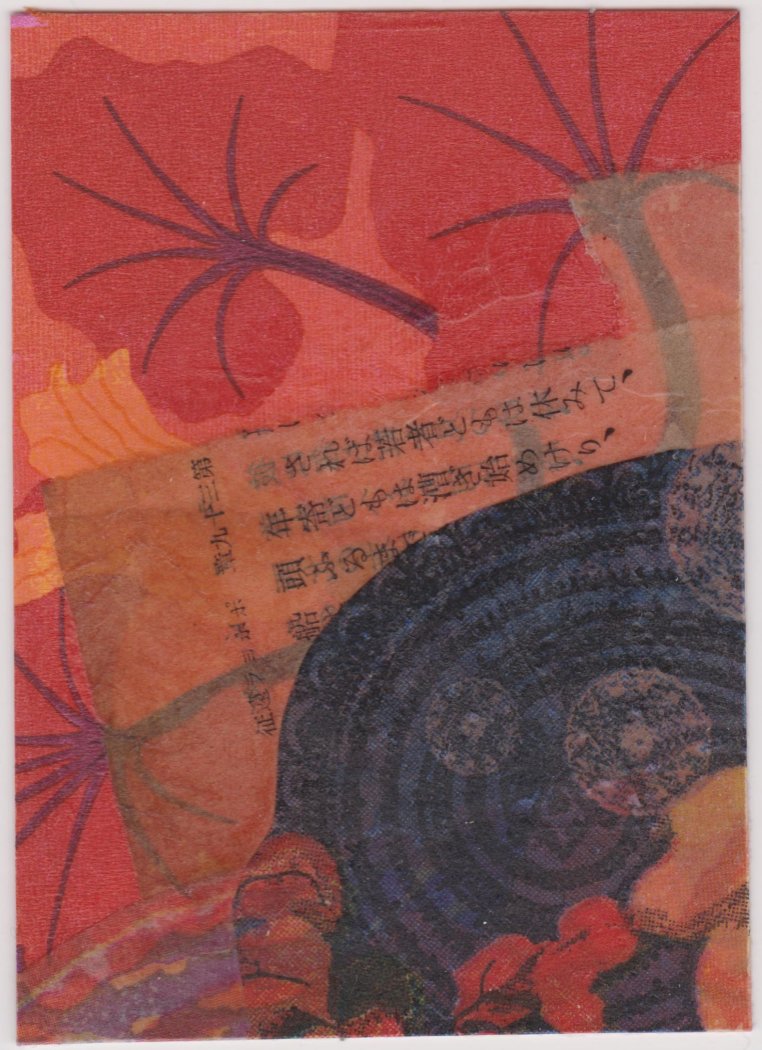
Something New: Beeswax Collage

It's been too long since I last posted, but I've been busy both with art and other duties. Mostly other duties. However, the other day I was able to try yet another new technique that I'd long been long tempted to try! That's beeswax collage with napkins. It's kind of like decoupage but with more see-through layers.

Napkin, tissue papers and other thin, soft, nearly transparent papers are good, too. The paper needs to let the melted beeswax through, otherwise it won't glue on properly. I melted the beeswax with a craft iron, first melt it on the card, then glue on first layer, then more wax and so on. I was quite excited and slightly scared about how messy it might be, let alone if the wax started to burn or something. So I didn't even think of taking how-to-do photos this first time!


But it wasn't that bad. The beeswax melts little by little and does not stream all over. However, the iron should be an old-fashioned one without the steam holes or teflon coating, and dedicated to crafting. No more ironing of clothes after this! If you want to use your ironing board for clothes still, it's a good idea to protect it with an old pillowcase or t-shirt first (make it tight so it does not move) and then on top of it a sheet of baking paper.

The beeswax works both as a glue and a sealant here. This is a very fast technique but I recommend cutting lots of pieces cut ready before you put the iron on. I made about 10 ATCs, a chunky page and some backgrounds in two short sessions. I wasn't happy with all of them but here are the ones I like the best, 3 ATCs and a chunky 4x4 page. I love the ethereal looking results, where all the layers really seem to melt together!

These cards were made for trades at ATCs for All.


Jotain uutta taas: Mehiläisvahakollaasi

Viimeisestä postauksesta on ihan liian kauan, muut velvollisuudet veivät kaiken aikani viime viikkoina. Viikonloppuna pääsin pitkästä aikaa kokeilemaan jotain uutta, mitä mieleni oli pitkään tehnyt testata, nimittäin kollaasia sulatetulla mehiläisvahalla. Tekniikka muistuttaa decoupagea, mutta lopputuloksena on läpinäkyvämmät kerrokset.

Sulaa vahaa valutetaan korttipohjaan ja paperia lisätään kerros kerrallaan. Paperin on hyvä olla pääasiallisesti ohutta ja huokoista, joka päästää vahan lävitseen, kuten servettiä tai silkkipaperia. Pienempiä palasia voi olla myös tavallista paperia, esimerkiksi kirjansivut tai nuottipaperit ovat kiva lisä. Sulattamiseen on saatavilla jonkinmoisia patoja (engl. melting pot, en ole Suomessa nähnyt), jolloin voi käyttää myös rakeena myytävää mehiläisvahaa.

Itse päätin testata helpoksi kuvattua tekniikkaa eli askartelukäyttöön omistettua silitysrautaa. Silitysraudalla sekä sulatetaan vaha että silitetään kuva kiinni korttiin. Tässä menetelmässä vahan pitää olla pötkönä, jota pidetään kädessä silitysraudan pohjaa vasten. Helsingin Hobby Point myy mehiläisvahaa kynttiläntekoon tarkoitettuina levyinä. Pyöritin levyn rullalle, jotta sain siitä pötkön. En osannut yhtään arvioida vahan menekkiä etukäteen, mutta aika riittoisaa se on. Nyt on noin puolet jäljellä yhdestä levystä, joka maksoi alle kolme euroa.


En uskaltanut ajatellakaan valokuvaamista eri vaiheita, koska ajattilen homman voivan olla tosi sotkuista, tai pahimmillaan, että palohälytin repeäisi ulvomaan keskellä yötä! Vaha ei kuitenkaan sulanut virtanaan vaan sopivasti pikkuhiljaa. Raudan on hvyä olla teräspintainen ilman teflonpintaa ja höyryreikiä. Sen kuumuutta vaihtelin yhden ja kahden pisteen välillä.

Silityslautaa ei tarvitse uhrata pelkästään askartelukäyttöön, mutta se kannattaa suojata hyvin. Vanha tyynyliina, t-paita tai muu kangas, jonka saa pysymään paikoillaan, on hyvä. Päälle laitoin vielä leivinpaperin ja se toimi hyvin. Toisella kertaa se oli loppu ja käytin alumiinifoliota, joka ei ollut yhtä hyvä. Kortti alkoi tarttua kiinni folioon, kun siihen oli valunut vahaa.


Kollaasielementtejä kannattaa leikata valmiiksi etukäteen aika paljon, sillä kuuma rauta ja vaha eivät jouda odottelemaan. Toki raudan voi sammuttaa ja lisätä kerroksia myöhemmin. Tällä tekniikalla loihtii tosi nopeasti kauniita kortteja, joissa kerrokset sulautuvat ikäänkuin läpinäkyvästi yhteen. Lisäksi saa nauttia ihanasta mehiläisvahan tuoksusta!